General
Android
- The countroll® app can be downloaded from the Google Playstore
- Search for the word countroll (you will recognize the app by our logo) and install the app
- Make sure you allow the requested permissions when starting the application to make use of all possible features of the app in an optimal way
Web portal
The web portal is a cloud application. This means you don't have to install anything. Just open your web browser and navigate to https://app.countroll.com.
You can also find a link to the web portal on top of this webpage (Web Portal login)
Account
- Browse to the countroll® web portal: https://app.countroll.com
- Click on the link Sign up

- Fill in the following information: name, email, password (2x) and your manufacturer account ID

- Click the checkmark of Privacy Statement, Cookie Policy and License Agreement and click on the Register button
- Once the form has been submitted, you will receive an activation email. Open this email and click on the activation link.
- You can now login on the web portal with your mailaddress and password (https://app.countroll.com)

What can go wrong?
- What exactly is the manufacturer account ID and where to find it?
This is a unique number that the manufacturer uses to identify its clients. Check the next FAQ to see where to find it. - I didn't receive the activation mail within a reasonable amount of time?
It's possible that the activation email arrived in your spam folder or that it was blocked by the mailserver of your company. First check your spam folder. If no mail is found, contact us via info@countroll.com and we'll do what is necessary to activate your account. - I got an error when clicking on the Register button. What to do now?
For security reasons we check the domainname of your mailaddress against the known domainnames in the manufacturer's ERP. If this doesn't match, you will get an error. For that reason you'll have to register with your mailaddress of the company.
How to proceed? Just contact info@countroll.com with the error mentioned in the mail. We'll do what is necessary to create and activate your account.
roller label info:

inspection report:

quotation:

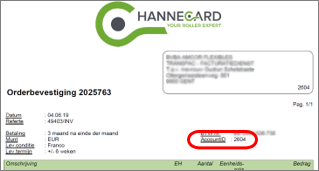
order confirmation:
delivery document:

Or contact your manufacturer's contact person. They will be able to provide you the correct ID.
Log in
- Start the countroll® Android app
- Fill in your username (=email address) and password and click on Log in

Log out
- On the Home screen, click the 3 dots on the top right of the screen
- Now click on Logout

- Confirm that you want to log out by clicking on Yes
Log in
- Browse to https://app.countroll.com, enter your username and password and click on Login
Log out
- Click at the bottom left on the Exit icon to log out from the web portal

- Log in on the web portal
- Click on the avatar icon at the bottom left of the page
- In the left menubar, click on Password
- Now enter your old password and 2x your new password and click on Save

Android
- Make sure you are logged out
- On the top right, select your language

- Log in again
Web Portal
- The language selector is situated on the top right of the web portal. The language will change on the fly.

UI
Based on the permissions associated to your account, you will see more or less icons on the Home screen.

- Scan ID
This is the basic feature of the Android app. With Scan ID you can scan a countroll® QR-code, enter a countroll® roller ID or a customer roller ID to get all the info about that specific roller. - Download sensor data
Click on this button to connect to a sensor and to transfer the data from the sensor to the cloud. - Sensor data processing status
This screen will give a status overview of the downloaded, uploaded and processed sensor data on the countroll® cloud platform. - Manual initialize
This feature gives you the possibility to add assets to countroll® and to link a QR-code to your asset. - Copy countroll® Label
Is a QR-code damaged or you want to add an extra label? With Copy countroll® Label this is done in a blink of an eye. - countroll® Nip
This feature can only by used by customers that bought a countroll® Nip set. - Enable Sensor Gateway
Instead of reading sensor data once, enable the Sensor Gateway to transfer data automatically each time a sensor becomes active and you're close enough to the sensor. - Admin
The is the administration screen of the localization feature - Link Asset to Location
Have you created locations on countroll®, then you can link assets to those locations. Simply scan the QR-code of the asset followed by scanning the QR/barcode of the location.

| 1. Asset overview: | by clicking on this icon, the application will return to the asset overview page of the web portal | |
| 2. Asset details: | when you click on an asset, the asset details page is opened as a tab on this page | |
| 3. Scan QR-code: | this icon will activate the camera of your device for scanning a countroll® QR-label | |
| 4. Customer admin: | clicking this icon will redirect you to another page where you can find:
| |
| 5. FAQ: | a link to the FAQ (this page) | |
| 6. Account: | get or change your account details (e.g. changing your password) | |
| 7. Log out: | log out from the web portal | |
| 8. General search: | type in a string/substring of one of the fields of a roller you are looking for. You can also search for a number of an order, invoice, delivery, ... | |
| 9. Company selector: | if your account is linked to more than 1 company, you can select the active company from this dropdown list. Only the rollers of your selected company are shown on the screen | |
| 10. Language selector: | the web portal is currently available in English, Dutch, French. You can change the language on the fly. | |
| 11. Filter: | click on the double arrow to open the filter panel for locations. You can select a default or current location; the assets in the overview will be filtered based on your selection. When a selection is active, the corresponding icon next to Filter will turn green. | |
| 12. Asset selector: | by default the overview of rollers will be shown. countroll® also supports other asset types. Click the asset type you want to see the overview of or to which your search action should be applied | |
| 13. Sortering: | clicking the header will change the sorting order of your rollers (default, ascending, descending) | |
| 14. Filter on column: | reduce the list by entering a filter. For numeric fields you can also use the following operators: >, >=, <, <= | |
| 15. Roller overview: | the overview of all your rollers taking into account the general search field, the location field and the filters applied | |
| 16. Export: | you can export the overview to excel or CSV | |
| 17. #results: | the amount of rollers you want to see at once on your page | |
| 18. Paging: | navigate through the overview pages |
QR label - Management features
Android
- Open the countroll® app
- Click on Scan ID
- On the Scan ID page, you have several options to search for a roller:
- Use the camera to scan the QR-code of the label on the roller
- Enter the countroll® ID of the roller manually and click Continue
- Enter your own roller ID manually and click Continue
Option 1
Option 2
Option 3
The app will show you the profile screen of the roller. You can now click on Timeline to get an overview of all events of that roller 

How to get info about a roller on the Web Portal?
Web portal FREE version
- Log in on the web portal
- Search for any number or string containing a number that matches...
- countroll® roller ID
- customer roller ID
- roller cover length
- roller cover diameter
- roller cover hardness
- sales order number
- delivery number
- invoice number
- manufacturer workorder number

- Click on Search to find all matching rollers

- Finally, click on the roller you want to see the details of
Web portal PRO version
- Log in on the web portal
- Click on the roller in the overview you want to see the details of

This feature is only available for PRO users!
- Search your roller on the web portal
- Click on the roller to open the details
- Click on the Edit button

- Click now on the button Take permanently out of service

- You can provide a reason for deactivating the roller

- Search your roller on the web portal
- Click on the roller to open the details
- Click on the Timeline tab on top of the page
- Search for the event you want to see the details of and click on To event details...
- On the right side, scroll down to Documents. Click on inspection_report.pdf to open the document in a new browser tab.

This feature is only available for PRO users!
- Search your roller on the web portal
- Click on the roller to open the details
- Click on the Edit button
- Add or change some values of the roller core properties and finalize by clicking on the Done button

This feature is only available for PRO users!
Android app
- Open the countroll® app
- Click on Scan ID
- Scan the QR label of a roller or enter the roller ID manually
- You are on the roller profile screen. Click now on the Timeline button
- Click at the bottom of the screen on the + in green circle icon to create a new event


- Select the event type, fill in all mandatory fields (and optional fields) and select if the event is public or private (public by default)
- Click on Save event to create the event on the timeline
Web portal
- Search your roller on the web portal
- Click on the roller to open the details
- Click on Timeline on top of the screen
- On the left side of the screen, click on the Add event + button

- Select the event type, fill in all mandatory fields (and optional fields) and select if the event is public or private (public by default)

- Click on Save event to create the event on the timeline

This feature is only available for PRO users!
- Start the Android app and log in
- Click on Scan ID
- Scan the QR label of a roller or enter the roller ID manually
- You can now add a picture to the core of the roller or to an event on the timeline
- Core
At the bottom of the screen, click on the arrow up in a green circle icon on the root folder (or select a subfolder). You get the options to upload a document, audio or a picture. Select picture.
- Event
Click in the timeline icon and select an event by clicking on it. At the bottom of the screen, click on the arrow up in a green circle icon. You get the options to upload a document, audio or a picture. Select picture.
- Core
- Take a picture with your smartphone and confirm
- The picture will be uploaded to the countroll® platform and can also be consulted on the web portal
This feature is only available for PRO users!
On roller core level
- Search your roller on the web portal
- Click on the roller to open the details
- In the middle of the screen, you can find the Roller core documents section

- Select the folder where you want to upload the document (by default, the root folder)
- Drag&drop one or more documents to the dashed line rectangle

or click on the Upload files button and select the documents you want to upload - You can upload multiple files at once
On event level
- Search your roller on the web portal
- Click on the roller to open the details and click on Timeline to open the timeline of the roller
- Search the event where you want to add documents and click on To event details
- At the right bottom you'll find the same dashed line rectangle as on the roller core page to upload documents
Each time the QR label of a roller is scanned with the smartphone, the GPS coordinates of the smartphone are stored on the countroll® platform. 2 values are stored:
- GPS coordinates when scanned by the customer
- GPS coordinates when scanned by the manufacturer
Depending on who is logged in, the GPS coordinates of the customer or the manufacturer are shown on the screen.
The 2 examples below (android & web portal) are showing the location of the same roller but logged in with a different account (customer & manufacturer). The last known GPS coordinates are different. By clicking on the location icon you can see the coordinates in Google Maps.
Android

Web portal
Sensor - Monitoring features
The sensor is getting screwed on the roller with an M8 bolt. Ideally the sensor is getting screwed on the center of the axle (to avoid imbalance). But it's also possible to put the sensor on the flange.

The outer part of the bolt of the sensor is 15 mm long. The sensor weighs 66 gr.
The functioning of the sensor can be changed by modifying several parameters. These values will change...
- the frequency for sending its data
- the installationposition of the sensor on the roller (center or eccentric)
- the type of sensor: rotational (=rotating with the roller) or static
- ...
How to configure these parameters?
- Open the Android app and click on Manual initialize
- Scan the QR label of the roller on which you want to screw the sensor (or initialize a new one)
- Click on Search & Connect
- Activate the sensor manually with a magnet. Hold a magnet against the sensor just below the text COUNTROLL. Click on the Connect button next to the sensor that just get activated.
- Select the mounting type, optionally change other values and click on Write to Sensor
- The parameters are send to the sensor. Click Next to proceed; an Initialized event is now created on the timeline of the roller
- The sensor is ready to be screwed on the roller
Step 2
Step 3
Step 4
Activate sensor with magnet
Step 5a
Step 5b
Step 6a
Step 6b
One of the configuration parameters of the sensor is how often it should send its data. By default every 10 minutes the sensor will become awake and broadcast a bluetooth signal. This signal can be captured by a smartphone running the countroll® app. A connection will be established to transfer the data from the sensor via the smartphone to the countroll® cloud platform. The smartphone will act as a gateway.
- The sensor has enough memory onboard to store its data for several months.
- Once a connection is made with a smartphone gateway, the sensor data will be downloaded to the smartphone. For this step, no internet connection is needed, only a bluetooth connection.
- When the smartphone has an internet connection, the data will be uploaded to the countroll® cloud platform.
- The countroll® platform will process and analyse the sensor data before making it available for visualization.
These 3 steps (download, upload and processing) can also be checked on the smartphone:
- Start the Android app and click on Sensor data processing status
- Select the tab on top of the screen of which you would like to see the progress


- To clean up the overview (=remove items that are completed), click on Remove completed items
Automatic download
- Activate gateway: click on Enable Sensor Gateway. The icon will turn from red to green. Even when going to another app, the gateway remains active. This is also shown in the android top menubar by the countroll® icon. Sensor data from any countroll® sensor will now be downloaded automatically to the smartphone.
- Deactivate gateway: click again on the icon. I will become red again.


Manual download
- Start the Android app and click on Download sensor data
- Click now on Search & Connect in the BT Sensor section
- Wait until the sensor becomes active automatically or activate it manually by a magnet. Click on Connect to establish the bluetooth connection between the smartphone and the sensor.
- The process of transferring the sensor data will start automatically
- A green checkmark will appear in the screen once the transfer is finished. The app will continue will step 2 (upload) and 3 (processing) in the background.


Step 1 Step 2 Step 3 

Step 4 Step 5
Nip - Measurement features
- Start the Android app and click on countroll® Nip
- Adding a roller: optional but recommended:
- click on Add roller
- scan the QR-code of a roller or enter the roller ID manually
- the diameter will now appear on the screen next to the roller


- Adding a Nip device
- click on Tap to add Nip
- press the button on the Nip device
- click on the serial number corresponding with the device
- once the connection is established, it will be shown on the screen as 0.0 and the color matches the LED of the device
- repeat these steps for adding more Nip devices


- Insert the strip of the Nip devices between the rollers
- The Nip measurements will change immediately when modifying the settings of the rollers; the recommended total crown correction will only be shown when 2 rollers were added

- To save the Nip measurements on the timeline of the selected rollers, click the disk icon
- Turn off the Nip devices by pressing 3 seconds on the device button or by clicking the small cross icon of the Nip in the app
Icons explanation
- bullet in circle: color indicator of LED (red, green blue)
- battery icon: battery status
- triangle icon: Bluetooth signal strength
- cross in circle: click this icon to disconnect and turn off Nip device
Didn’t find what you were looking for?
Please contact us and we’ll be happy to assist you.